Gluten Free Blackberry Swirl Marshmallow Cake
Have I got a beauty to share with you today. I eluded to
here but I am so excited to share it now. After only one minor disaster it
turned out great.
I came across this recipe in Sharon Hearne Smith’s new book No Bake Baking. The principle of the book is being able to create great bakes without using the oven. In theory it works but for those of us on a gluten free diet who are not so lucky to be able to buy premade flan cases I used a simple sponge recipe to create my take on the dessert.
I came across this recipe in Sharon Hearne Smith’s new book No Bake Baking. The principle of the book is being able to create great bakes without using the oven. In theory it works but for those of us on a gluten free diet who are not so lucky to be able to buy premade flan cases I used a simple sponge recipe to create my take on the dessert.

For the gluten free sponge I used the following:
4 Large eggs
1tsp Vanilla extract
2tbsp Milk
2tbsp Milk
1cup+2tbsp Unsalted butter
1cup+2tbsp Caster sugar
1 cup Self-Raising gluten free flour**
1tsp Xanthum gum
11/2tsp Gluten Free baking powder
2tbsp ground almonds
2tbsp ground almonds
Preheat oven to 195C. Grease and Line two 8 inch sandwich pans. Whisk eggs, vanilla and milk together
until fluffy. Set aside
In a separate bowl shift the flour, baking powder and xanthum gum
together, mix well.
Set aside.
Cream the butter and sugar together until light and fluffy. Gradually add the egg mixture on medium mixing well with each addition.
If mixture curdles, turn the mixer up high for a few seconds and it will become smooth again. Using a large metal spoon fold in the shifted flour.
Once mixed spoon into lined tins and smooth to edges. Bake in the middle of the oven for 20 to 25 minutes or until cake is well risen and sponge springs back when touched. Insert a skewer in centre ensuring it comes out clean when removed. Allow to cool in the tins for 10 minutes before turning out on a wire rack.
**To make self raising gluten free flour I add one and a half teaspoons of baking powder with a quarter teaspoon of salt for each cup of gluten free flour**

Moving on to the fun part now to complete the cake you'll need the following
Prepared sponge (defrosted the night before)
Blackberry Compote
1/2cup fresh blackberries
2tbsp caster sugar
Marshmallow Filling
23g powdered gelatine (2 x 11.5g sachets)
1/3cup cold water
2cups caster sugar
2cups caster sugar
2/3cup maple syrup
1/2cup +1tbsp cold water
1/2cup +1tbsp cold water
For decoration
2tbsp icing sugar
A handful of fresh blackberries
1 fresh mint sprig
With a long, sharp knife, carefully slice the sponges in half horizontally, creating four discs. Set aside the prettiest one for the top. Grease the sides of an 8 inch loose bottom cake tin with oil and line with parchment paper. Sit one of the sponge discs in the bottom.
To make the blackberry compote, place the blackberries in a small saucepan with the sugar. Crush roughly and cook over a medium heat for 1-2 minutes until soft and slightly thickened. Remove and leave to cool.
To make the marshmallow, pour 1/3 cup of cold water into the bowl of a food mixer. Sprinkle in the gelatine and stir gently to ensure it’s all soaked. Leave for 5-10 minutes until all the water is absorbed.
Place the caster sugar, maple syrup and 1/2cup +1tbsp cold of water in a small heavy-based saucepan and stir over a low heat until the sugar dissolves. Then turn up the heat, bring to the boil and leave to bubble gently until it reaches 130°C on a sugar thermometer. This takes 4-5 minutes and the syrup will become dark amber in colour. Remove immediately from the heat and leave to cool for 1 minute.
Once the gelatine has soaked up all the water, turn on the food mixer to a low speed to break it up a bit. Then slowly and carefully trickle in the warm syrup, down the inside of the bowl rather than onto the whisk. Once all the syrup is added, whisk for 2-3 minutes until the mixture doubles in size and becomes stiff and meringue like. Gently fold in the blackberry compote.
Working quickly, pour one-third of the mixture over the sponge base in the tin, levelling it with the back of a spoon. Lay another sponge disc on top, followed by another third of mixture, again levelling smooth. Add a third disc and the remaining filling, and finish with the final best looking sponge disc on top.
Cover with cling film and leave to set for about an hour until firm when pressed. The cake can be prepared to this stage up to 24 hours in advance. It doesn’t need to be stored in the fridge, just keep it airtight.
When ready to serve, remove from the tin, peel off the paper, sit on a cake stand and dust the top evenly with icing sugar. Carefully heat the length of a thin metal skewer in the flame of a gas hob or blowtorch until hot. Press the hot skewer onto the centre of the cake top to make a brand mark.
Continue to brand the top at 2.5 cm intervals either side of this middle line, wiping and reheating the skewer each time before pressing it down. Then turn the cake 45 degrees and repeat the markings creating a diamond pattern.
Finally, arrange a handful of blackberries in a neat pile on the cake and add the mint sprig.

In true Shelly form I had a bit of an accident with one of my sponge cakes and hadn't time to make another so I ended up dividing one sponge into four slices which made for a low cake but if and when you guys try it, the cake should be about one and a half inches higher.
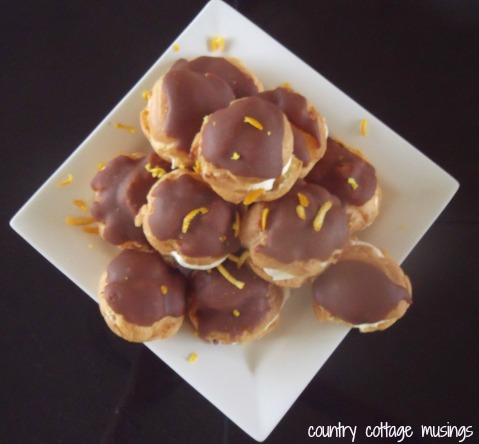
I also made Gluten free profiteroles for the party and you can find that recipe here
I hope everyone had a wonderful weekend. I can not believe we are in the middle of July already and I haven't even finished my June projects. The summer sun is a good excuse right??
Sharing with
Wake Up Wednesday Link Party
Motivational Monday link party
Chantille Fleur for Tea Party Tuesday
Bloggers Brags Weekly Pinterest Party
Culinary Ginger and the ladies for Foodie Friends Friday
The Creative Exchange Link Party
Gods growing Garden and the ladies forThe Great Blog Train
Real Food, Allergy Free and the ladies for Allergy Free Wednesday
The Novice Gardener for Fiesta Friday
The Creative Spark Link Party
Keeping.Life.Simple for The Gathering Spot
New Mrs. Adventures and the ladies for Tasty Tuesday
The Ultimate Link Party
A dish for daily life for Foodie Friday link Party
French Country Cottage for Feathered Nest Friday
Enchanting Everyday and the ladies for Enchanting Inspiration Link Party
Green Willow Pond for What We Accomplished Wednesday
Tess the Domestic Diva and the ladies for Allergy Free Wednesday
Smile for no reason's Everyday Life Photography Link Up Party
Baking in Pyjamas and the ladies for Sweet and Savoury Sundays
Liz Marie Blog for Inspire me Please Link Party
Creative Ways Link Party
Addicted 2 DIY for Thursday S.T.Y.L.E Link Party
Lewis Lane Designs for Tuned in Thursday
The Blissful Bee for Work it Wednesday
Just a Girl and Her Blog for Hit me with your best shot
Gluten Free Homemaker for Gluten free Wednesdays
Little Red Window and the ladies for Do Tell Tuesday
Refresh Style and the ladies for Inspiration Monday
In true Shelly form I had a bit of an accident with one of my sponge cakes and hadn't time to make another so I ended up dividing one sponge into four slices which made for a low cake but if and when you guys try it, the cake should be about one and a half inches higher.
I also made Gluten free profiteroles for the party and you can find that recipe here
I hope everyone had a wonderful weekend. I can not believe we are in the middle of July already and I haven't even finished my June projects. The summer sun is a good excuse right??
Michelle xxx
Sharing with
Wake Up Wednesday Link Party
Motivational Monday link party
Chantille Fleur for Tea Party Tuesday
Bloggers Brags Weekly Pinterest Party
Culinary Ginger and the ladies for Foodie Friends Friday
The Creative Exchange Link Party
Gods growing Garden and the ladies forThe Great Blog Train
Real Food, Allergy Free and the ladies for Allergy Free Wednesday
The Novice Gardener for Fiesta Friday
The Creative Spark Link Party
Keeping.Life.Simple for The Gathering Spot
New Mrs. Adventures and the ladies for Tasty Tuesday
The Ultimate Link Party
A dish for daily life for Foodie Friday link Party
French Country Cottage for Feathered Nest Friday
Enchanting Everyday and the ladies for Enchanting Inspiration Link Party
Green Willow Pond for What We Accomplished Wednesday
Tess the Domestic Diva and the ladies for Allergy Free Wednesday
Smile for no reason's Everyday Life Photography Link Up Party
Baking in Pyjamas and the ladies for Sweet and Savoury Sundays
Liz Marie Blog for Inspire me Please Link Party
Creative Ways Link Party
Addicted 2 DIY for Thursday S.T.Y.L.E Link Party
Lewis Lane Designs for Tuned in Thursday
The Blissful Bee for Work it Wednesday
Just a Girl and Her Blog for Hit me with your best shot
Gluten Free Homemaker for Gluten free Wednesdays
The Baking Beauties and Allergy free Alaska for Gluten Free & DIY Tuesday
Little Red Window and the ladies for Do Tell Tuesday
Refresh Style and the ladies for Inspiration Monday

Oh yum! I need to try this. Thank you for sharing this recipe. Always looking for gluten free.
ReplyDeleteThanks for stopping. I've been checking out your blog. You have a new follower. Lover your Style :-)
DeleteSimply Suzannes at Home
ReplyDeleteHi Michelle, Thanks so much for coming by and taking the time to leave a comment. I appreciate every one of them!
Your dessert is beautiful and looks so good! I'm always on the hunt for gluten free desserts, as many of my friends are on gluten free diets. Thanks so much for sharing with us!
Have a wonderful week,
Suzanne
Me too. It's so nice seeing comments on posts. I have a very sweet tooth so there are plenty more sweet treats to come. Enjoy the rest of your week!
ReplyDelete